Elasticsearch & Kibana — Part 1

Installing Elasticsearch on Ubuntu
First, let’s import elastic’s GPG key. This command fetches elastic’s GPG key and converts it into a format APT understands. The key ensures that the packages you’re about to install are authentic and secure :).
wget -qO - https://artifacts.elastic.co/GPG-KEY-elasticsearch | sudo gpg --dearmor -o /usr/share/keyrings/elasticsearch-keyring.gpg

Now, let’s add the elasticsearch APT repository. This tells APT where to fetch Elasticsearch packages from. The signed-by option links the repo to the GPG key we added for secure verification. We then update our package list with sudo apt update.
echo "deb [signed-by=/usr/share/keyrings/elasticsearch-keyring.gpg] https://artifacts.elastic.co/packages/8.x/apt stable main" | sudo tee /etc/apt/sources.list.d/elastic-8.x.list

sudo apt update

APT now knows where to find elasticsearch and we install it with:
sudo apt-get install elasticsearch
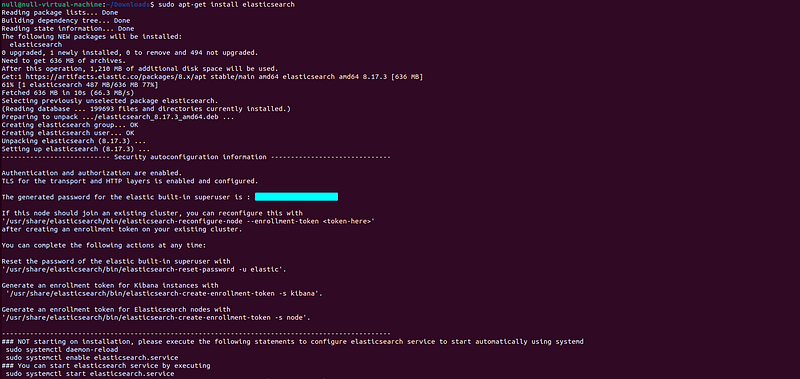
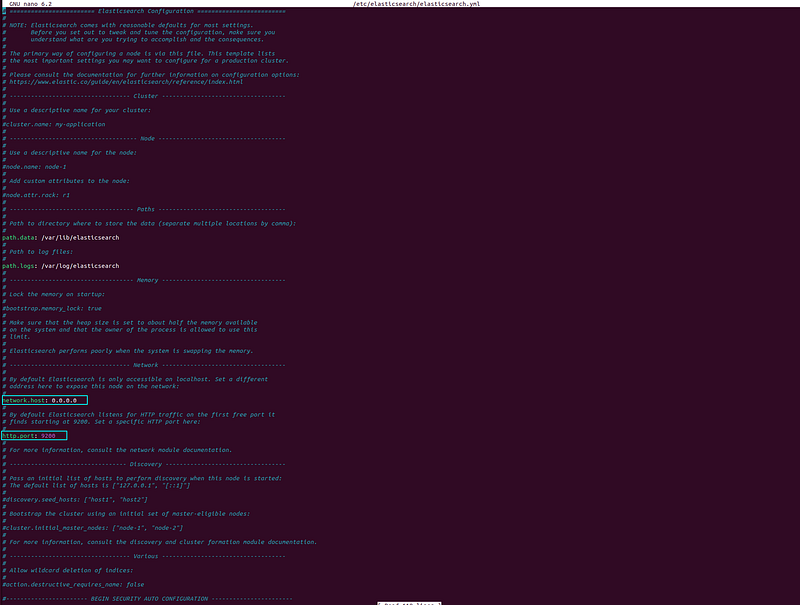
Let’s configure elasticsearch network settings, in this file, you’ll want to configure the values network.host and http.port depending on your setup. For example:
network.host: 0.0.0.0
http.port: 9200
sudo nano /etc/elasticsearch/elasticsearch.yml
Enabling elasticsearch to start on boot, ensures elasticsearch runs every time your system boots (no one wants to start the service each time manually).
sudo systemctl daemon-reload
sudo systemctl enable elasticsearch

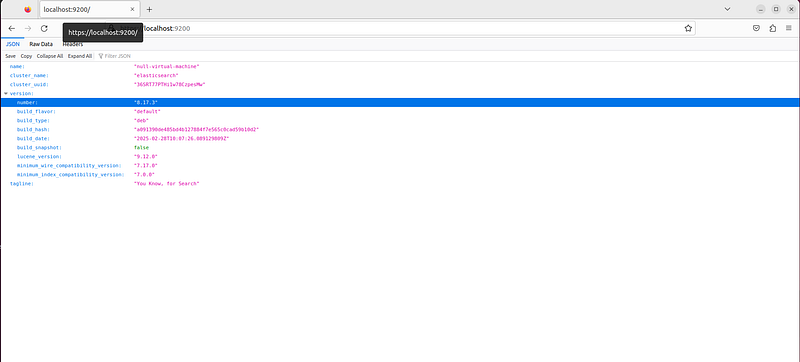
Once you start the elasticsearch service you can check that everything is running smoothly using the status command.
sudo systemctl start elasticsearch
sudo systemctl status elasticsearch

It's up and running!

Installing Kibana on Ubuntu
Installing kibana:
sudo apt-get install kibana

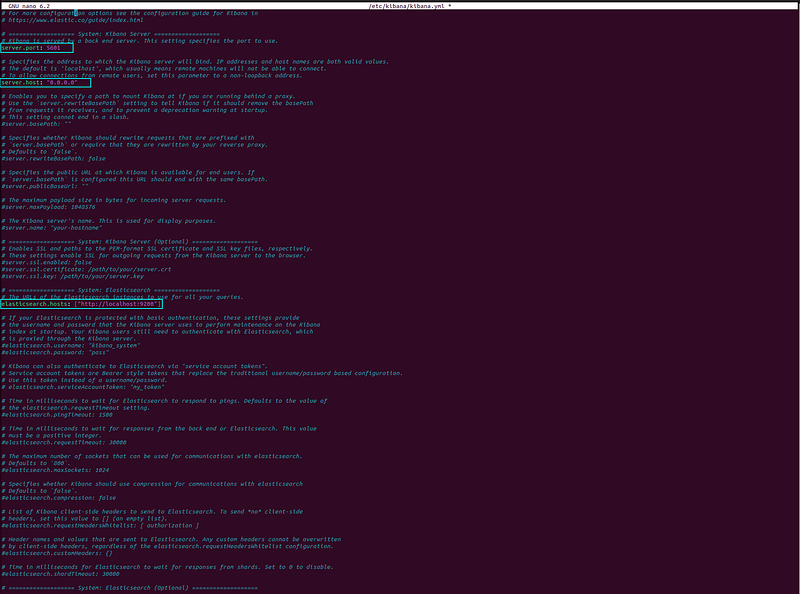
Now let’s configure kibana by updating some of the values below:
server.port: 5601
server.host: “0.0.0.0”
elasticsearch.hosts: [“http://localhost:9200"]
This sets kibana to be accessible on port 5601 and connects it to your elasticsearch instance.
sudo nano /etc/kibana/kibana.yml
Next, let's enable kibana and ensure it starts automatically when the system boots.
sudo systemctl enable kibana
sudo systemctl start kibana
sudo systemctl status kibana

To securely connect kibana to elasticsearch, generate an enrollment token (you’ll use it in the kibana web setup process):
sudo /usr/share/elasticsearch/bin/elasticsearch-create-enrollment-token -s kibana
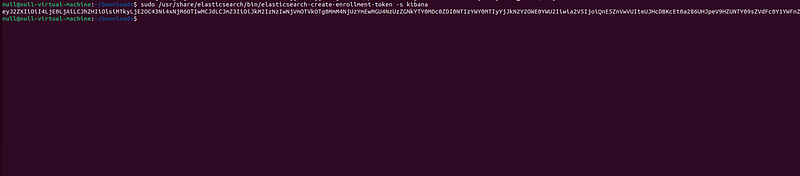
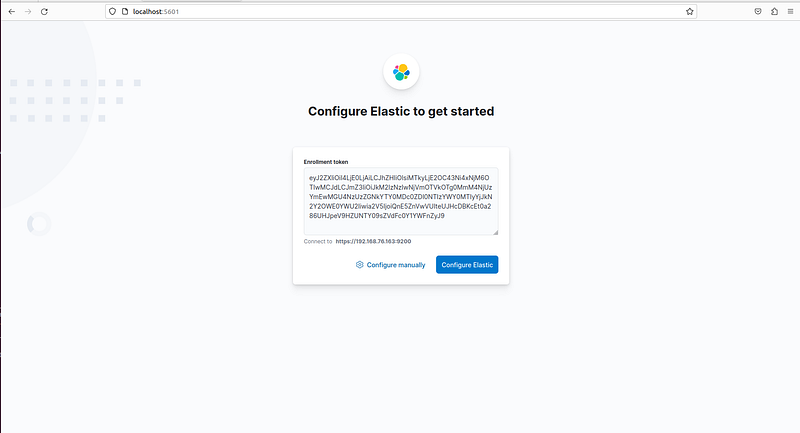
Open kibana in your browser and paste in the enrollment token. Click Configure Elastic to continue.
Kibana will prompt you for a verification code. Generate it with:
sudo /usr/share/kibana/bin/kibana-verification-code
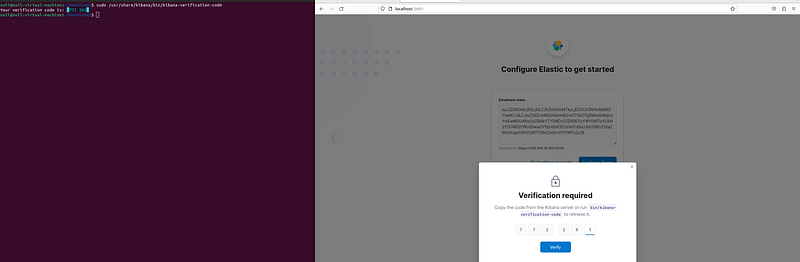
Enter the code, then proceed with logging in using the username (elastic) and the password generated during elasticsearch installation.

That’s it! You now have a fully running Elastic Stack with both Elasticsearch and Kibana configured.
 Wow, Very Win, Such Amaze!
References:
https://www.elastic.co/guide/en/elasticsearch/reference/current/install-elasticsearch.html